When you have big events, managing invitations and keeping track of who will attend can be overwhelming. RSVP comes from the French phrase “répondez s'il vous plaît,” which means “please respond.”
However, with the use of RSVP Google forms, event organizers can gauge attendance and make necessary arrangements accordingly.
This guide will walk you through how to create Google RSVP form, so you can manage your event's guest list without any hassle. Google Forms is a free online form builder that allows users to create RSVP forms, making it an accessible tool for event organizers.
Still using Google Forms? There is a better way!
involve.me is a powerful no-code solution to build engaging forms that integrate quiz, survey and calculator elements
Step 1: Getting Started with Google Forms
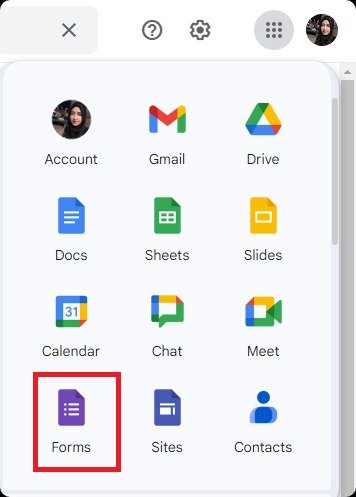
Log into your Google account to create RSVP Google form. If you don't already have one, you'll need to create it. Once logged in, navigate to Google Forms. You can do this by going to the Google Forms website directly or accessing it through the Google apps menu.
Step 2: Choosing a RSVP Google Form Template
Google Forms provides a variety of pre-made templates, including ones for RSVPs, which can give you a head start. However, if you have specific needs or prefer a more hands-on approach, starting with a blank form allows for greater customization. Consider the nature of your event and decide which option best suits your needs. If you're new to Google Forms, exploring Google Form RSVP templates might provide insights into potential question types and layout options.

Step 3: Designing Your Form
The event title of your RSVP Google form should be clear. It's the first thing respondents will see, so make it inviting and informative. Beneath the title, provide event detail, such as the date, time, and location. This is also a good place to include any additional information guests might need before deciding if they can attend.

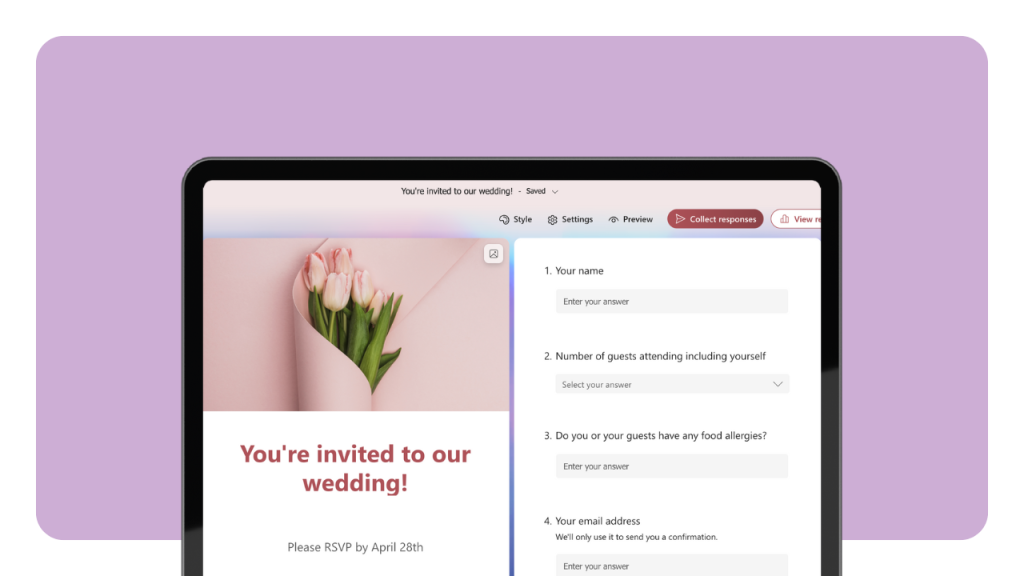
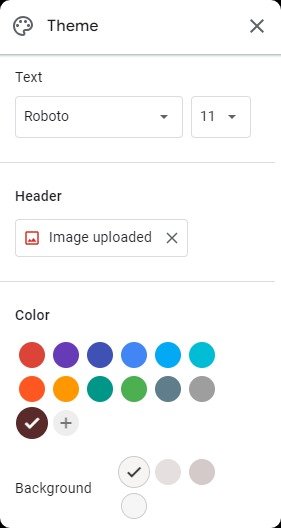
Google Forms allows for basic customization of your form's appearance. You can select theme colors and font styles that align with your event or your organization's branding. For more personalized forms, consider adding a header image related to the event. These visual elements can make your Google RSVP form more engaging and set the tone for your event, especially if you're customizing a wedding RSVP Google form template.
Step 4: Adding Questions for RSVP
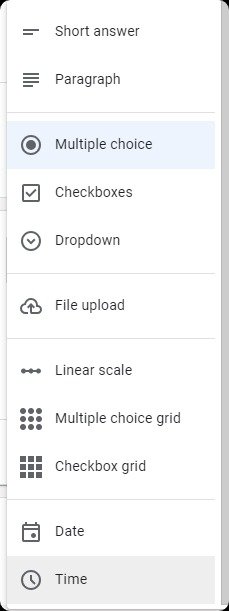
Google Forms supports various question types, including short answer, paragraph, multiple choice, checkboxes, and drop-down menu. For an RSVP Google form, you’ll typically use short answers for personal information, multiple choice for attendance confirmation, and checkboxes for options like meal preferences.
You can also organize your form by adding a different section for specific topics, such as meal preferences or transportation, to make the form easier to navigate.
RSVP Google Form Example Questions
Name: A short answer question for the attendee’s full name.
Contact Info: Email and phone number fields, also as short answers.
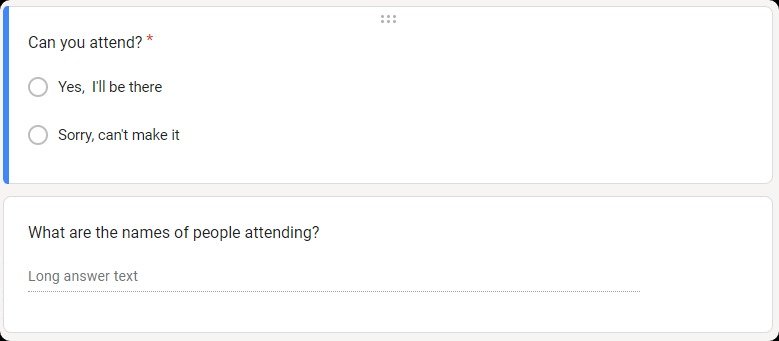
Attendance Confirmation: A multiple-choice question with options such as “Will attend,” “Will not attend,” and “Maybe.”
Dietary Restrictions: A checkbox question where attendees can select dietary restrictions or a short answer for specifics.
Number of Attendees: A field where guests can specify how many people will attend, such as if they are bringing a plus-one.
Tips on Question Clarity and Comprehensiveness
Be direct and clear with your questions to avoid confusion. For example, instead of asking “Do you have special dietary needs?” you might ask, “Please select any dietary restrictions from the list below.”
Consider using conditional questions based on previous answers to keep the form relevant for each respondent. For example, if someone indicates they are attending, follow up with questions about meal preference or transportation needs.
Keep the tone friendly yet professional to encourage responses and convey the importance of the information being requested.
You can review and manage all submitted answers in the 'Responses' tab to ensure you have all the necessary information.
Step 5: Finalizing and Sharing Your Google RSVP Form
So you've built your Google forms RSVPs, but hold on! Are you really ready to hit send? Let's make sure you're not missing any crucial steps that could make or break your event planning success. You'll want to add a message section to provide those last-minute instructions or give your guests that warm welcome they deserve, trust me, this personal touch makes all the difference.
Next up, take a moment to review your form's settings because nothing's worse than realizing something's off after you've already sent it out. Use the eye icon in the top right corner to preview your form and actually test the RSVP process from your guest's perspective, you'd be surprised what you might catch.
When everything looks perfect and you're confident it's ready, it's time to click that send button and distribute your form. Google Forms offers various sharing options to suit your needs:
Email: Directly send the form to your guest list through Google Forms by entering their email addresses.
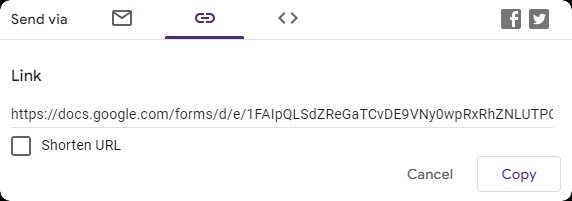
RSVP Form Link: Generate the URL for your RSVP form and share the RSVP form link in messages, on social media, or within digital invitations.
Embedding on a Website: If you have an event website or a blog, you can embed the RSVP link directly on a page, making it easy for visitors to RSVP.
To maximize response rates:
Send a personalized email or message along with the form link, explaining why their response is important.
You can also shorten the URL for easier sharing with guests.
Consider following up with guests who haven’t responded as the event approaches. A gentle reminder can help increase your response rate.
Make the RSVP deadline clear, and give guests enough time to check their schedules and respond.
Step 6: Managing Responses
Google Forms automatically collects responses in a convenient and organized manner. You can view them in several ways:
Summary View: Get an overview of the responses, perfect for quick insights and counts.
Individual View: Look at each response in detail.
Responses are also automatically organized in a spreadsheet format, which you can access directly from the form. For more in-depth analysis or to integrate the RSVP data with other planning tools, you can export the responses to Google Sheets.
You can also enable email notifications to be alerted whenever a new response is submitted, ensuring you stay updated as soon as someone replies.

Limitations of Creating Google RSVP Forms
Basic Customization
Google Forms only offer basic customization options, such as changing the color scheme and adding images. Event organizers looking to create a form that perfectly matches their event's branding or theme may find these options lacking. The design elements are somewhat generic, and the ability to customize the layout, font styles beyond the presets, and other visual aspects of the form is limited.
Many alternatives to Google Forms offer more engaging and interactive RSVP collection processes, which can better align with specific event needs.
Limited Automations
Another notable limitation of Google Forms is its lack of advanced automation features and direct integrations with external tools. For example, event organizers often need to automate follow-up emails based on specific responses or integrate RSVP data with their CRM or event management software. While Google Forms can be connected to other applications via Google Sheets and third-party automation tools like Zapier, this process can be less intuitive and may require additional setup time and technical knowledge.
Lacks Key Features
Moreover, Google Forms does not support native payment integrations or the ability to schedule appointments, features that can be crucial for certain events. As a result, you cannot collect payments directly through Google Forms for events that require fees or donations.
No Automated Follow-ups
Besides, event planners may find themselves needing to manually follow up with attendees for more detailed confirmations, additional information, or updates related to the event. This could include dietary restrictions, specific attendance times, or preferences for breakout sessions, which may not be thoroughly captured through the initial form.
The need for manual follow-up not only adds to the workload of the event organizer but also increases the possibility of communication errors or oversights. This process can be time-consuming and less efficient, especially for large-scale events or when precise attendee information is critical for the event’s success.
The Better Alternative to Google Form RSVPs: Creating Appealing RSVP Forms with involve.me
involve.me is a no-code form builder designed to create engaging and interactive forms, quizzes, surveys, and more, including RSVP forms for events. It stands out from Google Forms primarily due to its powerful features, such as array of customization options, payment integration, automatic follow-ups, built-in feature for detailed analytics, displaying response rates, drop-off points, form visits and engagement metrics.
Create your own RSVP form with involve.me
Step-by-Step Guide on Creating an RSVP Form with Involve.me
Here is how to create RSVP form with involve.me in 5 simple steps:
Step 1: Choose a Template
Start by selecting from a wide range of pre-designed event registration templates or opt to create your form from scratch for a fully customized approach.
Create Your Own RSVP Forms
Get Started with 350+ Templates
Giveaway Template
Product Review Form for Ecommerce Template
Cancellation Survey Template
Proactive Job Application Form Template
Client Intake Form For Legal Services Template
Customer Onboarding for Energy Industry Template
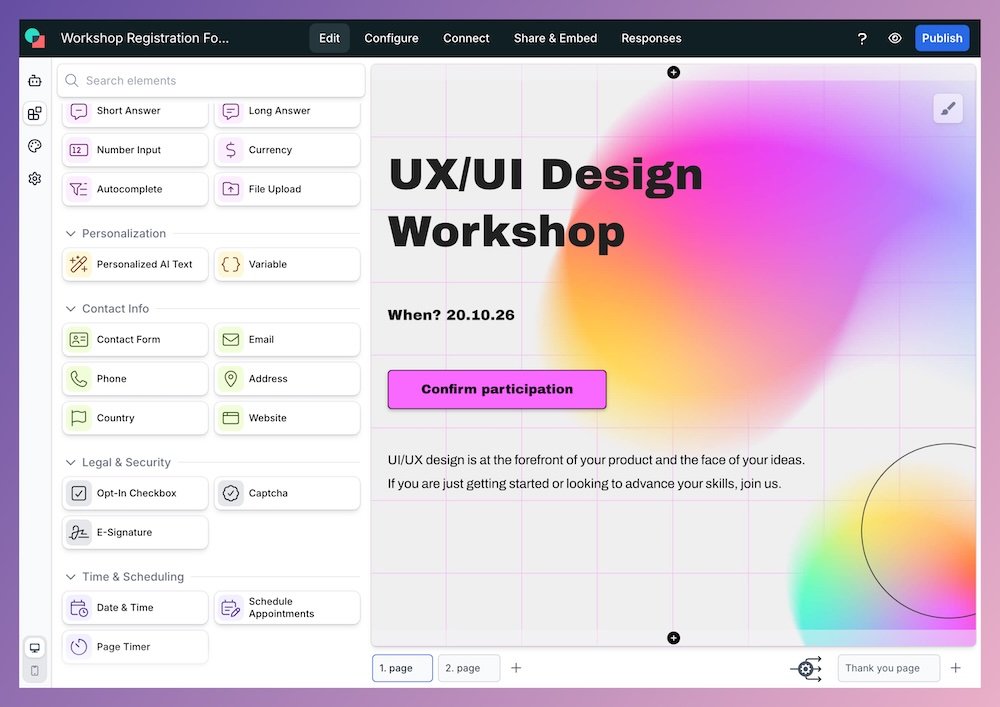
Step 2: Customize Your Form
Use the drag-and-drop editor to add questions, customize design elements, and embed multimedia content. Ensure your form reflects the tone and theme of your event.
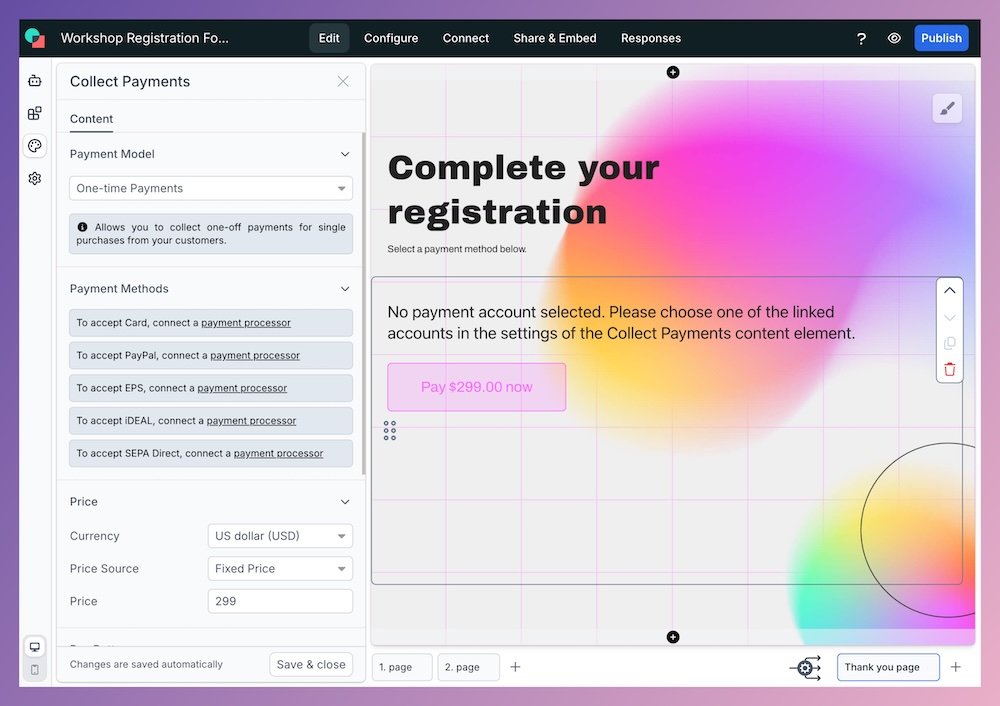
Step 3: Set Up Payment and Automatic Responses
If your event requires a fee, integrate your payment gateway. Then, configure automatic emails for confirmations, reminders, or additional information based on user responses.
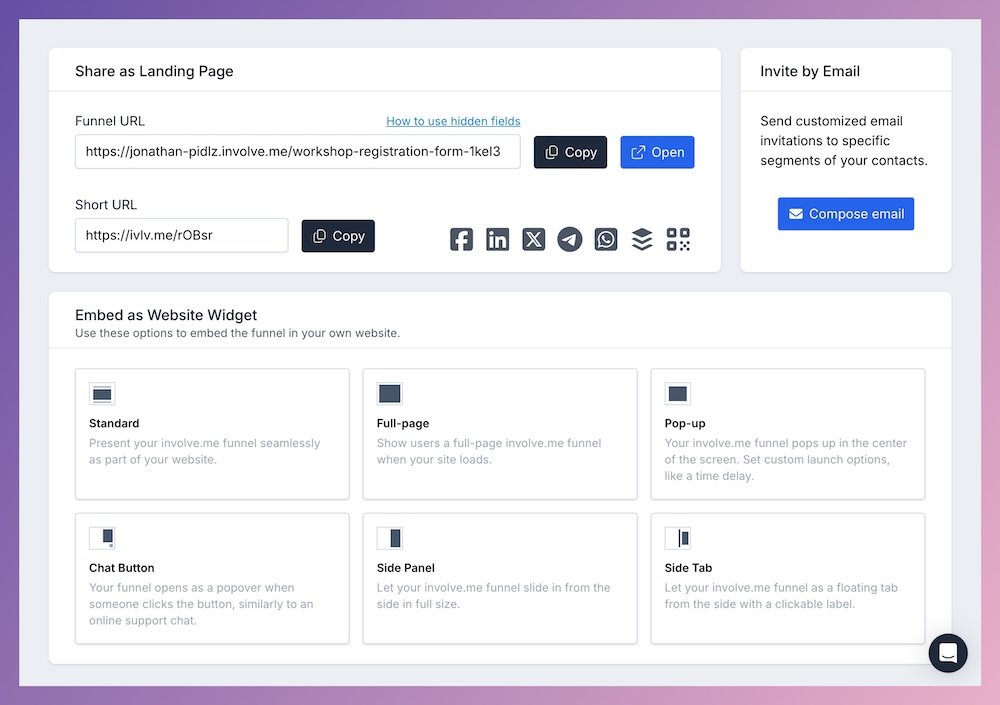
Step 4: Share Your Form
involve.me offers various sharing options. Whether through direct links, email campaigns, or embedding on your website, sharing your RSVP form is straightforward.
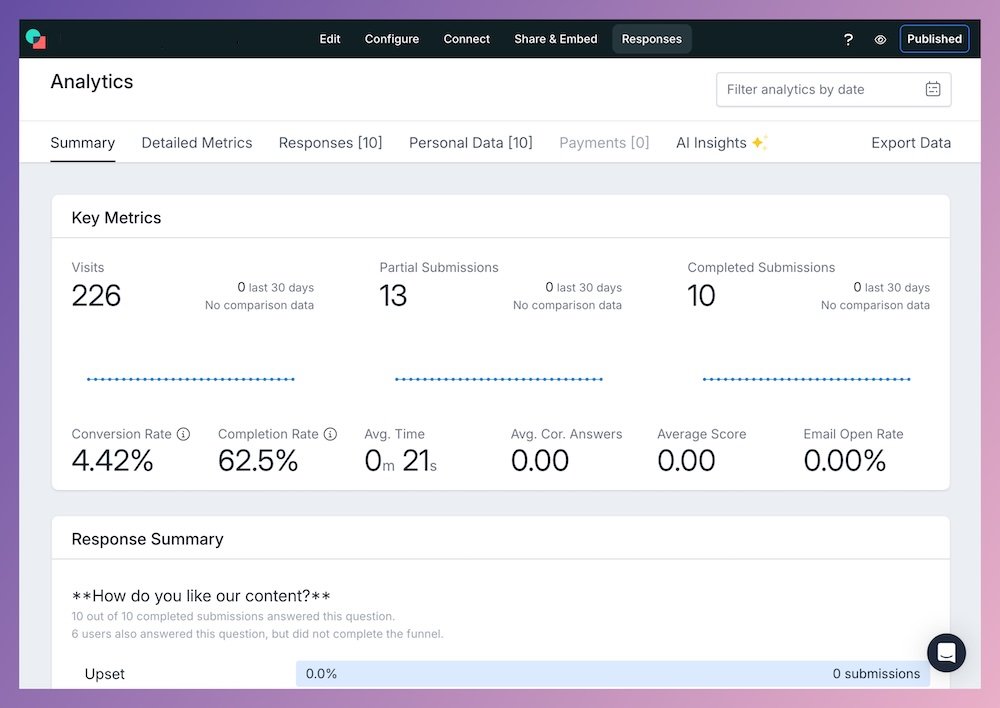
Step 5: Analyze and Follow Up
Monitor your form's performance through the analytics dashboard and use the insights to follow up efficiently with your attendees.
Create Your RSVP Form Now!
An effective RSVP form is a key component of successful event planning. While Google Forms provides a simple solution, online form builder like involve.me offer enhanced features for a more personalized and efficient experience. Therefore, choose the right tool that aligns with your event's needs to significantly improve response rates and manage your event's attendance more effectively.
Whether you're organizing a wedding, a corporate event, or a casual gathering, the goal is not just to collect responses, but to create an engaging process that excites your attendees about what's to come.

