Creating a high-converting landing page isn’t just about tossing some text and images together. It’s about guiding people, step by step, toward one clear action.
Every part of your page matters. The hero section? That’s your first impression. Social proof? That’s how you build trust. And the final call to action (CTA)? That’s your make-or-break moment.
In this guide, I’ll walk you through what makes a landing page actually convert. You’ll see:
What makes a good landing page
What to include (and what to skip)
Real-world best practices you can use right away
How to build your own, without a single line of code
Let’s get into it.
What Makes a Good Landing Page?
The ideal landing page structure is a focused sequence that takes visitors from promise to proof to action. This means starting with a strong Hero section (main headline, subhead, visual, CTA) that matches your ad’s promise, followed by your Unique Value Proposition, Benefits, Social Proof, and another primary CTA. After that, include any extra details (features, FAQs, or policy notes) and finish strong with a final CTA. Navigation often stays minimal (often no top menu) so visitors stay focused on the primary action.
Don't forget, it's often the first page visitors see on your website, so make sure it leaves a good impression!
The One-goal Rule
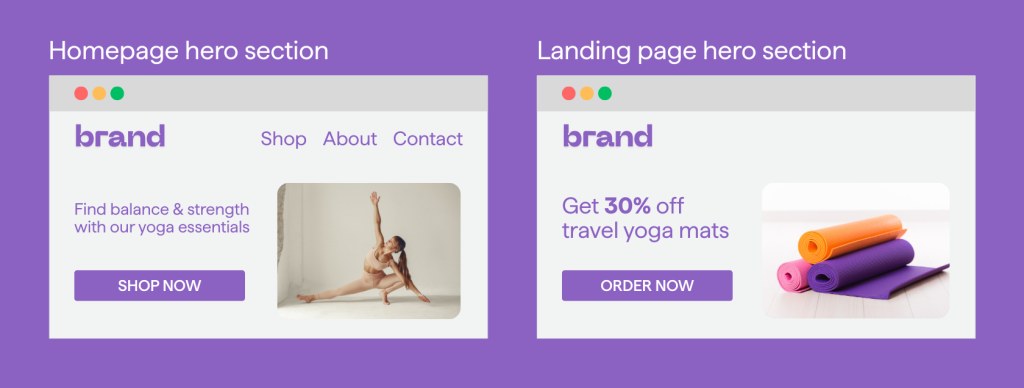
Single-purpose landing pages typically convert better as they give visitors a clear path to follow. Unlike a full website or homepage, a good landing page should strip away extra links (including internal links) and choices so there’s just one conversion goal. Fewer links. Fewer choices. Less distraction. More action.
For example, removing the navigation menu alone can double conversion rates because it reduces escape hatches. If you must include secondary information like “about” or extra links, hide them in the footer.
Remember: One page. One job.
Click‑through Vs Lead‑gen Pages
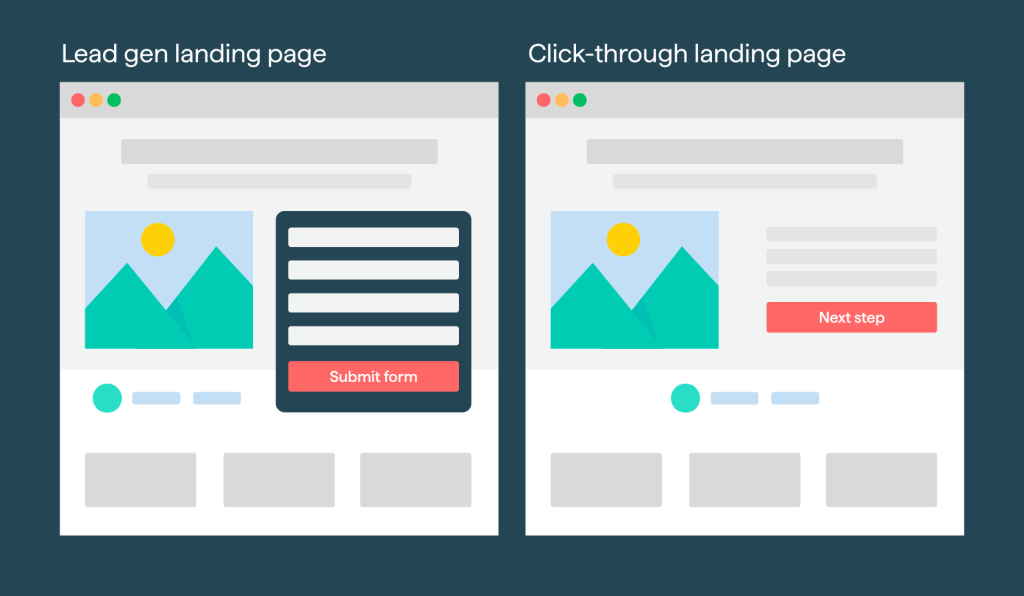
Landing pages generally fall into two structural types: click-through pages and lead generation pages.
Click-through pages: Educate first, then send people onward with a big call to action button to checkout, pricing, or signup. No form on the landing page. Repeat the call to action along the scroll. In this case, the structure might have more product details or benefits up front. Such landing pages are often used in e-commerce or to warm up prospects.
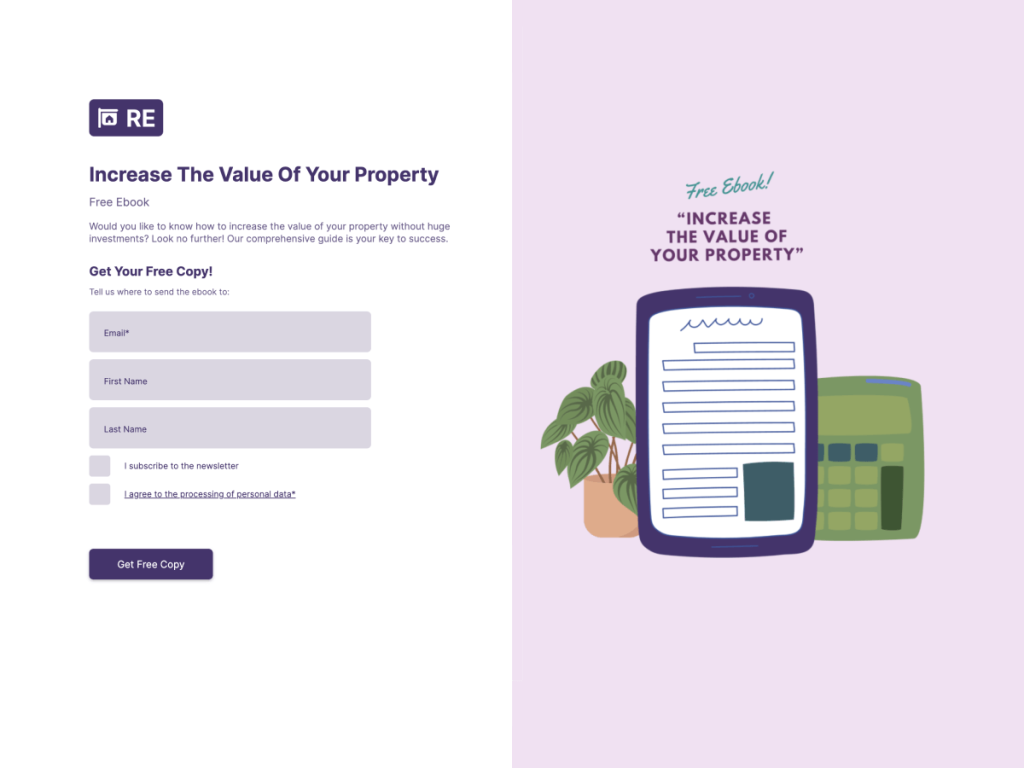
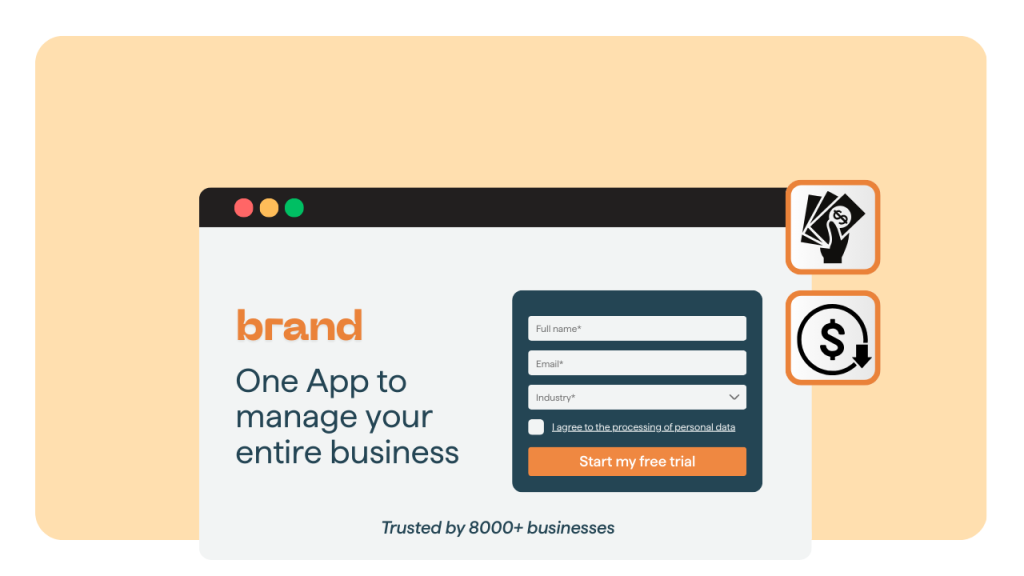
Lead-gen pages: Capture details on the page, so the landing page’s structure will include a form (often positioned early, possibly even in the hero). Lead-gen pages still have a hero, unique value proposition, and proof, but use the form as the primary CTA. This form-first approach means the page can directly convert visitors into qualified leads without an extra click. Perfect for downloadable assets, demos, quotes, or waitlists.
Choose the format based on your goal: for example, use a lead gen page for an ebook download, but a click-through landing page for promoting a product trial that leads to a sign-up flow.
What Goes into the Hero Section (above the Fold)?
Above the fold means all key elements are visible without scrolling (usually the header, navigation bar, and hero section).
Here, the focus is on the hero as it carries the first impression. Use a clear benefit-driven headline, a tight subheading for context (add a specific benefit or clarify the offer), a supporting visual, and a single call to action (CTA) prompting visitors to take the next step. Mirror your ad’s wording for instant message match. Short trust cues like “Used by 5,000 marketers” can help with credibility.
Headline Patterns That Work
Coming up with a compelling headline is easier if you follow proven patterns.
Problem → Outcome: The headline identifies a pain point and immediately promises a solution. For example: “Tired of X? Get Y in 7 days.”
Benefit → Proof: The headline states a desirable benefit and maybe a quick proof point. Example: “Increase email signups by 50%. Here’s how.”
Product → Use case: A simpler pattern introducing your product or offer in terms of the user’s need. Example: “Meet [Product], your budgeting assistant.”
Whichever pattern you use, make sure the headline is clear and compelling (Be clear over clever). Use numbers and power words. Use the target audience’s language.
Form Vs CTA Button in the Hero? It Depends
The answer depends on your offer and target audience’s readiness.
Simple ask (ebook, newsletter): a short form up top can boost conversions as it removes an extra step and lets motivated visitors convert immediately. For example, a lead-gen landing page might have an email input and “Get the eBook” button right in the hero.
Bigger commitment (purchase, complex signup): use a bold button that leads to the next step. For instance, a landing page for a software trial might use a hero button that says “Start Free Trial” which then takes the user to a sign-up form or pricing page. This keeps the hero uncluttered and you can introduce more details below before the actual form appears.
Also consider mobile experience. On mobile, long forms feel heavy. A button that scrolls to a form or opens a modal often wins.
Which Core Sections Should Every Landing Page Include?
To break it down, here are the core building blocks you’ll typically find on a high-converting landing page:
Unique Selling Proposition (USP): What makes your offer unique and valuable, highlighting what sets your solution apart. Often placed near the top.
Benefits + key features: Expand on your unique selling proposition with a section that highlights the key benefits of your product or offer. It clearly shows how your solution solves the visitor’s problem/pain point or improves their situation. Tie each feature to a benefit. Example: “Templates - launch pages faster with 200+ designs”.
Social proof: Show evidence that others trust or have succeeded with your offer using customer testimonials, client logos, ratings, quick stats.. For maximum impact, place some trust signals high on the page (even in the hero as a small line like “Join 5,000 subscribers…” or below the hero as logo bar) and again near your CTAs, so it nudges people at the decision moment.
Primary CTA or form: Reintroduce the action once trust is built. For a click-through page, this might be a large button section (“Ready to get started? [Sign Up Now]”). For a lead-gen page, this might be the form area with a header like “Sign up for your free demo” and the form fields.
Objection busters: To further boost confidence, include a section that addresses common questions or concerns. Think of what a skeptical visitor might worry about, and preemptively answer it.
Focused footer: A landing page’s footer is typically simple and focused. Unlike a website’s main footer, you don’t want a ton of distracting links. Only the essentials. This typically includes secondary items such as a privacy policy, terms of service, maybe contact info, sometimes a minimal menu of links, or even a repeated CTA.
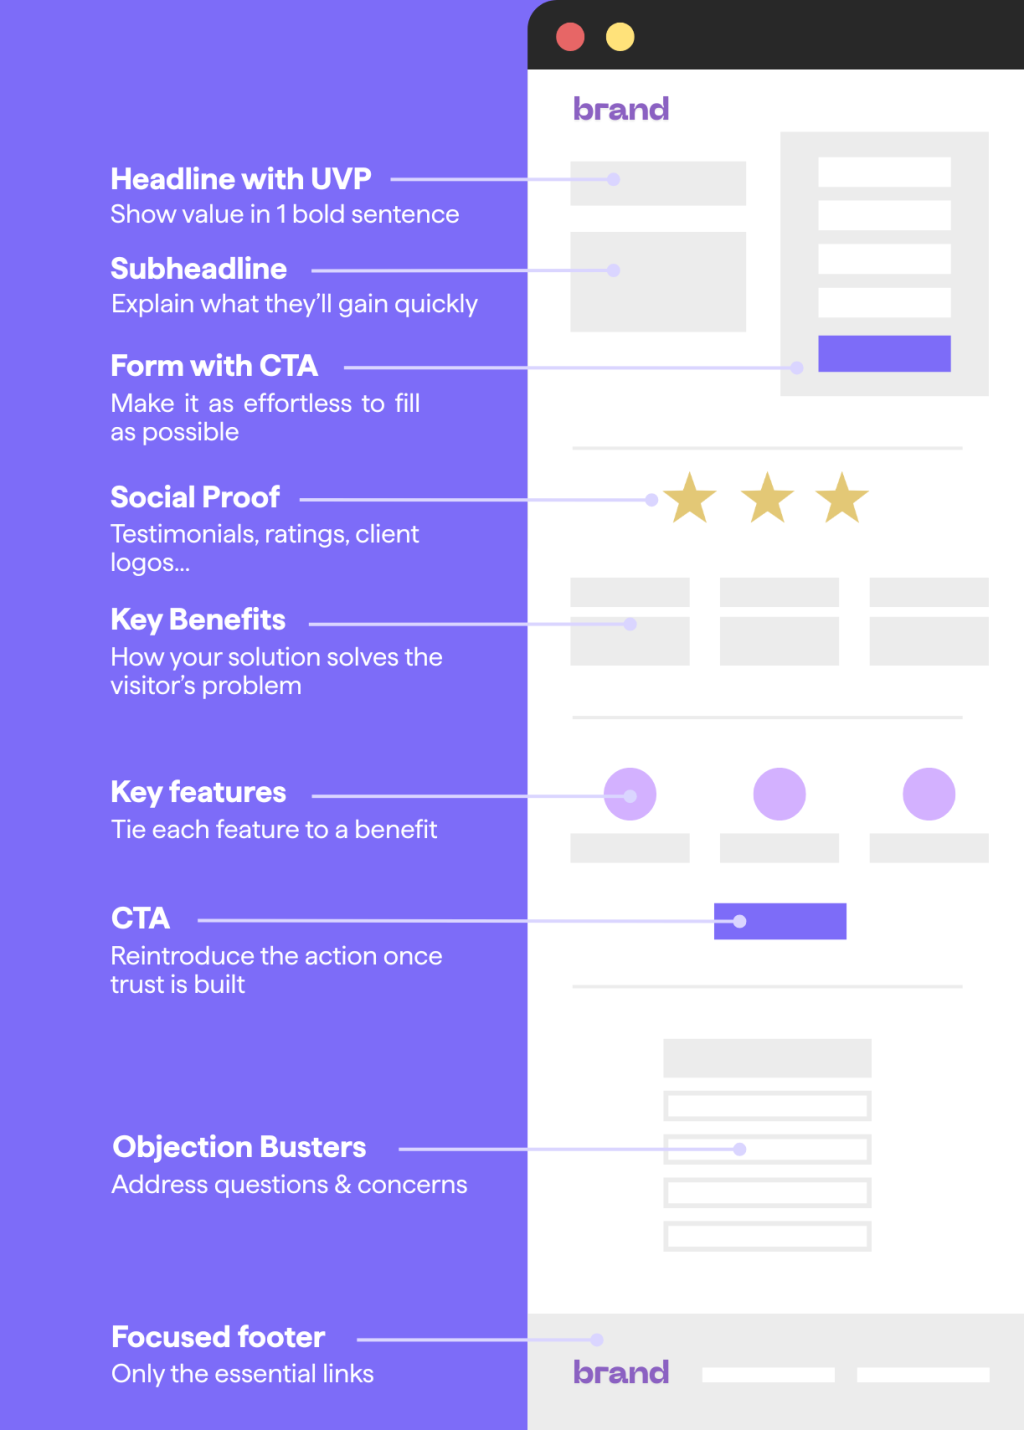
Together, these tell a tight story: visitors' attention → clarity → trust → action. You can adjust the depth of each section depending on your use case (for a very simple offer, you might have very brief benefits and only one FAQ, etc.), but generally this structure covers all the bases needed for conversion.
Use Social Proof That Actually Persuades
Not all social proof is equal, and using the right format (or a mix of them) can significantly increase credibility. In any case, use authentic, specific, and relevant social proof to reassure visitors that “people like me have had a good experience with this.”.
Testimonials are perhaps the most powerful as they put a human face to your success stories. So make sure to use specific images or video testimonials with names and faces.
Another format that works great is to feature logos of companies that use your product or of media outlets that have featured you (“As seen in Forbes, TechCrunch…”). If big names trust you, new visitors feel safer.
If you have a SaaS, for example, you can also show a quick visual cue of quality by displaying ratings like “4.8/5 on Capterra”.
Additionally, you can use mini case-study stats as proof of outcomes or popularity. For example, “+120% increase in conversions” or “5000+ landing pages created every month using our tool.”
Objection Busters: How to Answer the “but…”
Even with a solid pitch and glowing customer testimonials, people still hesitate. It's normal. That’s why you need an objection-busting section. A spot where you handle doubts before they derail the conversion.
Because if you don’t answer their questions… they’ll leave to find someone who will.
Start with a short FAQ. Just 3–5 key questions your visitors are probably thinking (“How much does it cost?”, “Is this secure?”, “Do I need to be technical to use this?”). Each answer should be quick, scannable, and clear.
But don’t stop at FAQs.
Add trust-builders like:
Money-back guarantees (“30-day refund, no questions asked”)
Low-risk offers (“No credit card required” or “Cancel anytime”)
Security notes (“256-bit encryption” or “Your info stays private, always”)
If compliance is relevant, say so. Things like “GDPR compliant” or “SOC2 compliant” can matter a lot to some users.
Want more? Discover 11 landing page best practices to build high-converting landing pages.
How Should I Structure the Form for Conversions?
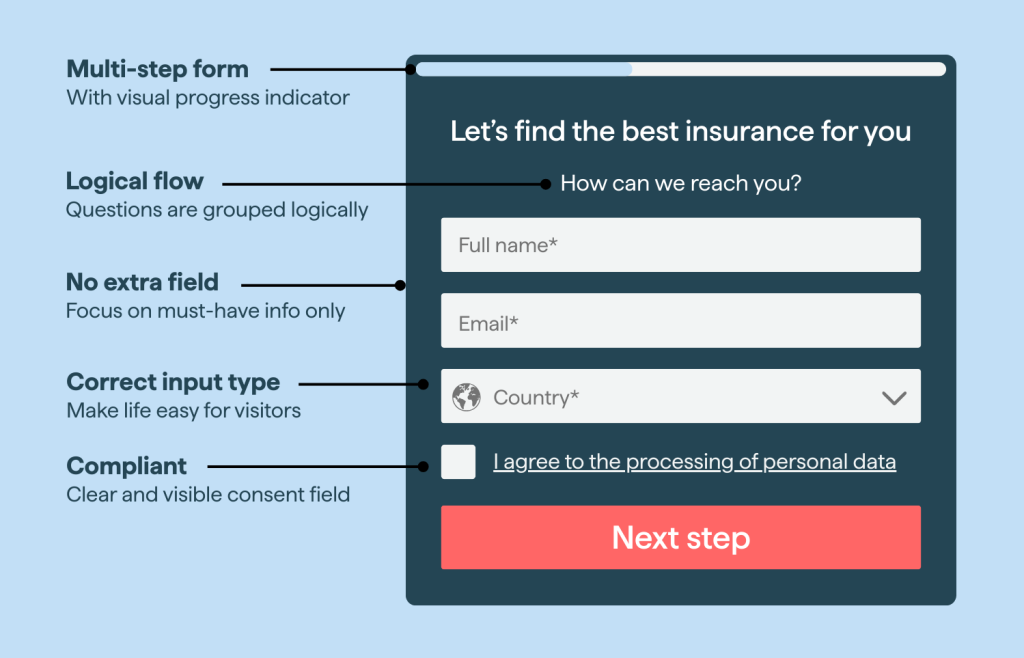
To get more people completing your form, design it to be as effortless as possible. Data shows shorter, cleaner, multi-step forms can lift completion significantly. Here are some best practices and tips for structuring your form:
Ask for less. Every extra field hurts. Collect only what you need now. (eg. Do you really need a phone number for a free download? Avoid overwhelming visitors.
Group logically. Group related questions together to make it logical (eg. “Name” and “Email” in a “Contact” section)
Choose the right input types. Make typing easy, especially on mobile (eg. Email, phone, dropdowns)
Inline validation. Fix errors as they happen, not once the user hits “Submit” (eg. little green checkmarks or red error notes as the user fills out each field)
Go multi-step when long. If you have more than 3-5 fields, consider splitting the form. Multi-step forms can boost completion rates by up to 300%.
Include consent clearly. GDPR, terms, and privacy. Place it near the submit button and use plain language. It’s important for legal compliance and also builds trust.
Write a benefit-oriented submit button. “Get my quote” beats “Submit.”
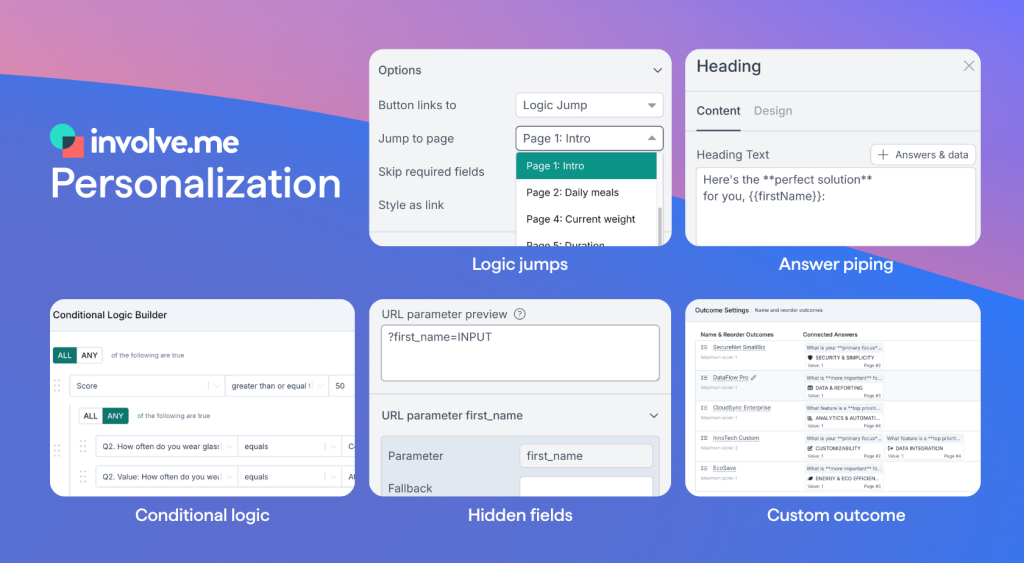
Personalization and Logic Keep Forms Feeling Short
Want more people to complete your forms? Make them feel like the form was built just for them.
That’s where conditional logic comes in. It lets your form adapt to users in real time. Based on their answers, you show (or hide) certain questions. Simple tweak. Huge difference. You avoid clutter and users only see what actually matters to them.
You can also take it further by skipping whole sections or branching the form based on interests. Say you’re generating leads. Someone picks "Product A"? Show them questions about Product A. Someone else picks "Product B"?
Same form, different questions, totally different experience.
You can also personalize landing page copy with answer piping. For example, if a user says their name is “John”, a later screen can say: "Thanks, John. Here’s your personalized offer..."
It feels personal. And it keeps people engaged.
Pro tip: use hidden fields for tracking or pre-filling data. For example, pre-fill the email field if you already have it, or pass a campaign UTM parameter from your ad’s URL into a hidden field. The user never sees it, but you capture which ad campaign they came from for your records.
Bottom line: Smart logic and personalization make your forms shorter, smarter, and more relevant. Less friction = more completions.
By the way, involve.me makes this super easy. No coding. Just set up rules in their drag-and-drop builder. Decide what to show, skip, or branch based on answers.
Feels like magic. But it’s just smart setup with involve.me.
Attachments and File Uploads
Here’s the thing with asking users to upload attachments: if it’s not essential, skip it. Every extra step increases drop-off. If it can wait, make it optional.
But if you really need a file from your users? Make it easy.
Be specific. Tell users exactly what to upload (eg. "PDF or DOC resume", "Photo of your receipt")
Set limits upfront. Avoid surprises (eg. "JPG/PNG only, max 5MB")
Where you place the field also matters.
Important? Put it early.
Optional? Tuck it at the end and label it clearly.
Need more than one file? Use a multi-file upload field. Keep it tidy. Don’t overwhelm users with too many separate upload slots.
Behind the scenes, ensure your system can handle the files securely. Tools like involve.me will store the files for you to retrieve, but if you have any integration (like sending the file to Dropbox or via email), set that up accordingly.
After submission, confirm receipt: "Thanks! We got your file. We’ll be in touch."
Where Should I Place CTAs and How Many Should I Have?
Use one primary call to action site-wide. Repeat it: hero, mid-page, and at the end. All these buttons or forms should lead to the same action. Keep secondary CTAs minimal and visually quieter. A sticky header with a CTA button can help, especially on mobile, as long as it isn’t intrusive.
There’s a formula that works well, and it’s simple: one page, one goal. But give visitors multiple chances to take action.
Here’s the breakdown:
1. Hero CTA: Catch the action-takers early
Your first CTA should be front and center. Right in the hero section.
Think: a bold button like “Start My Free Trial”. It could open a signup form, scroll to one, or just collect an email address. Make this CTA stand out. Use a contrasting color. Make it big. Make it obvious.
2. Mid-page CTA: For the slightly skeptical
Some people need more than a headline. Maybe they want to see benefits, read a testimonial, or understand how it works.
Right after that value, drop another CTA. This could be:
A section that says, “Ready to experience it yourself?” and a button.
A button tucked into a sentence: “Join now and see why 500+ companies trust us [Sign Up].”
Use the same offer as the hero CTA. Maybe tweak the wording to fit the section. But don’t change the conversion goal. Keep it focused.
3. Closing CTA: The final nudge
At the bottom, hit them with a final push.
Repeat the main message. Maybe sweeten the deal: “Start free with our ready-to-use template and boost your conversions today.”
Add a big button or form. This is for the readers who made it all the way down and just needed one last reason.
Also, never end a page without a CTA. Otherwise, it feels like a dead-end.
Button Microcopy That Pulls Its Weight
Your CTA button might be small, but it pulls a lot of weight when it comes to conversions.
That tiny bit of text? It’s called button microcopy. And when it’s done right, it gives users a clear, action-focused reason to click.
Ditch the Generic Stuff.
Buttons like “Submit” or “Send” don’t cut it. They’re vague, impersonal, and they don’t tell users what they’re actually getting.
Instead, write from the user’s point of view. Be specific. Be outcome-oriented.
“Download My Free Guide” beats “Download”
“Start My Free Trial” works better than “Start Trial”
Why? Because it feels more personal. It answers the question: What do I get when I click this?
Pro tip: Put yourself in your visitors’ shoes and finish this sentence: “I want to…”.
That’s the easiest way to write a strong CTA. For example:
If you’re offering a free trial → “Start My Free Trial”
Linking to a product demo? → “See It In Action”
Webinar sign-up? → “Save My Seat”
Be Clear About the Benefit
Your button should set expectations. Think less “Submit Form” and more “Get My Quote”, “Join the Waitlist”, “Access the Template”.
When people know what happens next, they’re more likely to follow through. Uncertainty kills clicks.
Keep It Short and Punchy
Aim for concise copy: 2–5 words. And lead with a verb:
Get My Quote
Download Free Guide
Start Free Trial
Join Now
Sprinkle in some personalization when it fits: “my,” “me,” or “mine” can help. For example: Build My Page, Show Me How, Claim My Spot.
Add a Little Subtext (if Landing Page Design Allows)
Sometimes, a small line under your CTA button can seal the deal:
“Start Free Trial”
No credit card required“Sign Up Now”
It’s free and takes 30 seconds
These little reassurances reduce friction. They remove doubt. Just make sure the subtext looks like subtext: smaller or lighter than the main CTA.
Match the Tone of Your Page
If your landing page is playful, your CTA can be too:
“Let’s Do This!”
“I’m In”
“Show Me the Goods”
Just make sure it’s still clear. Cute landing page copy shouldn’t confuse people. A good test? Ask: Would a first-time visitor know what happens when they click?
How Do I Adapt the Structure for Different Landing Page Types?
You’ll want to adjust your landing page structure slightly depending on the page’s purpose or industry, but the core principles remain.
Here is a quick reference of how different page types emphasize certain sections (think of it as a cheat-sheet for structural priorities):
Lead-Gen Page |
|
Click-Through Page |
|
Event Registration |
|
Product Demo/Trial |
|
Donation Page |
|
Waitlist/Coming Soon |
|
Survey/Feedback |
|
These are not rigid rules, but highlighting or adding certain sections will make each landing page type more effective.
The beauty of involve.me’s no-code builder is you can start from a template designed for that landing page type and customize sections as needed. For instance, using an Event Registration template ensures you have the agenda and signup form structure in place from the get-go.
Build It Fast with involve.me (no Code)
Building a good landing page with involve.me? Super easy. You don’t need to write a single line of code. Here’s how it works:
Pick a template that matches your conversion goal or describe what you want to our AI Agent using plain language.
Set your outcome: Choose what happens after completion: thank-you page, redirect to URL, or multi-outcome pages. Define your primary conversion event (form submit or button click) so analytics attribute results correctly.
Add landing page elements: Build landing pages with the drag and drop editor, using our 50+ core elements (buttons, headlines, text, images, videos,...).
Build the form (If you need one): Add fields: text, email, phone, file upload, multi-select, date. Use hidden fields for campaign data and enable UTM capture to track source /medium /campaign.
Add logic & personalization: Use conditional blocks to show/hide questions based on answers. Enable answer piping to reuse a respondent’s inputs in later text. You can also create multi-outcomes that route different segments to the most relevant next step.
Configure calculators & pricing (optional): Insert a Calculator element to score eligibility or compute quotes (fees, taxes, totals). Bind results to on-page text and CTAs. Use totals to qualify leads.
Enable payments (where applicable): Connect Stripe or PayPal; choose currency and amount (fixed or from calculator). Set confirmation emails/receipts and success redirects (donation thank-you, ticket page, etc.).
Brand it and make it safe with your colors, fonts, and high-quality images (avoid stock photos). Add privacy/consent text and any required policy links near the CTA to boost trust signals.
Connect integrations: Send landing page data to 60+ tools, including marketing platforms, CRMs and collaboration tools.
Publish: Publish your landing page as a standalone web page, embed it on your website, or even trigger it as a popup. Use a custom domain or an involve.me link.
Iterate: Use built-in analytics, AI insights, and A/B testing to improve. All without touching code.
Form‑first Tools
Multi-Step Forms & Partial Submissions
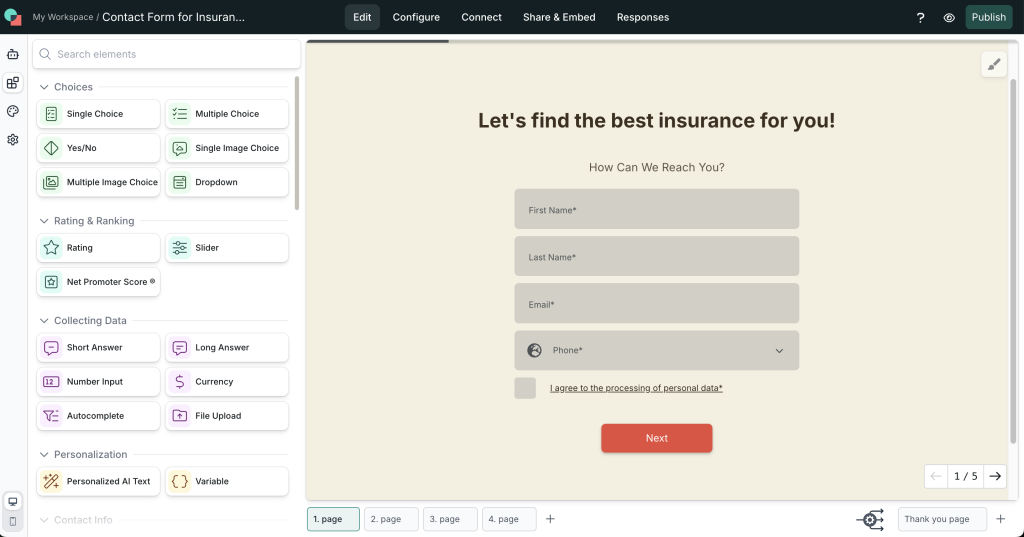
Using a multi-step form on your landing page? Good news: involve.me automatically captures partial submissions. That means even if someone bails halfway through, you still get the data they entered up to that point.
Why does this matter? Because:
You might win back leads with a follow-up.
You can see exactly where people drop off.
File Uploads & Attachments
Need users to send you something? With involve.me’s File Upload element, they can drag-and-drop files or select them from their device. You control what types of files they can upload and how big those files can be.
Perfect for:
Job applications
Quote requests
Support tickets with screenshots
Everything gets stored in your submission data, so it's easy to access.
Answer Piping
Want your form to feel more personal? Involve.me lets you carry a user’s answer from one step to the next. For example:
"Hi John, what kind of solution are you looking for today?"
You just use the "+ Answers & Data" button in the builder to insert previous answers into text blocks or outcome messages. It’s a small touch that can make a big difference in engagement.
Calculators & Pricing Estimators
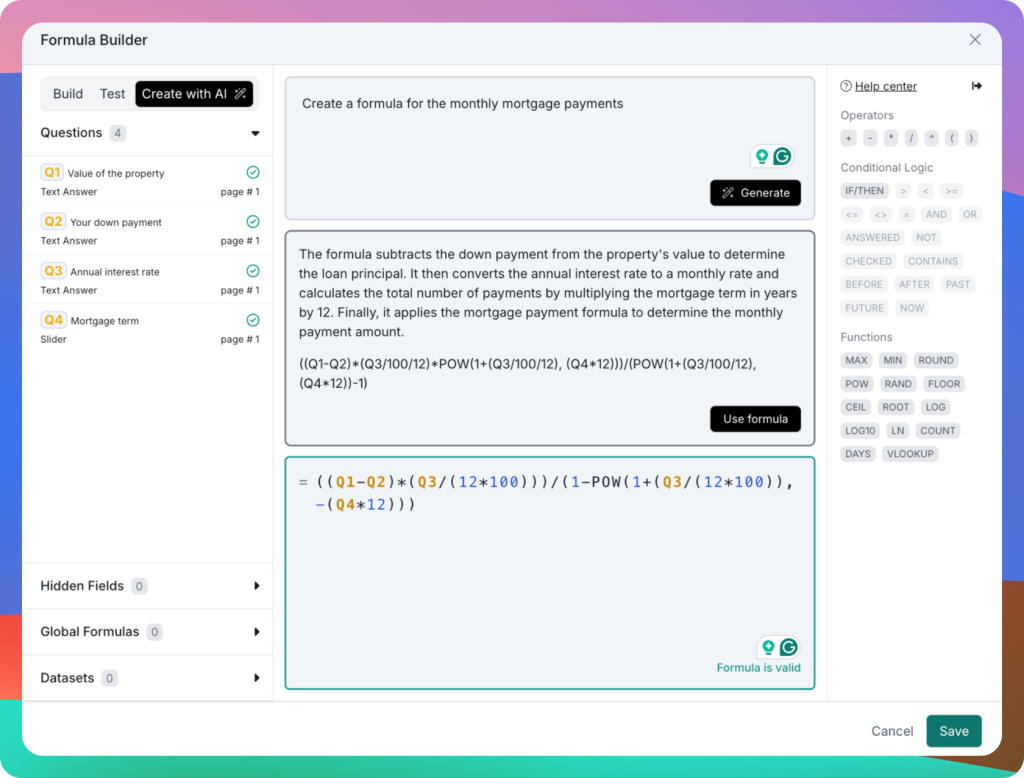
Want to add some interactive elements? Use the Calculator element to build things like pricing estimators or quote generators.
Here’s how it works:
Add inputs like quantity, hours, or service level
Set a formula using the formula builder (e.g. total = quantity * price)
Show the result instantly or gate it behind a form for lead generation
Templates for things like pricing quotes and savings calculators already have this set up. It’s a great way to deliver instant value before asking for a sign-up.
Payments Integration
Want to close the sale right on your landing page? Just add a Payment block.
You can accept payments via Stripe or PayPal, including:
One-time purchases
Subscriptions
Donations
All you need to do is connect your account. So whether you’re selling webinar tickets or taking pre-orders, the whole transaction happens inside the form.
Analytics & A/B Testing
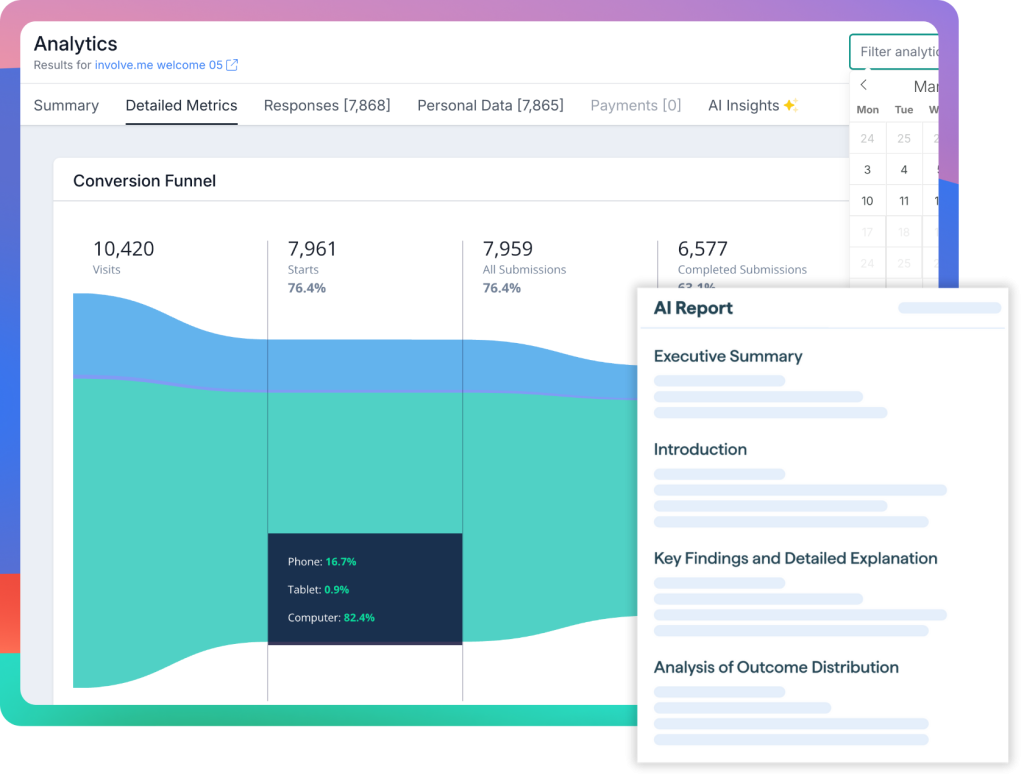
After publishing your form, dive into the Analytics tab. You'll see:
Visits, conversion rates, and average time spent
Page-by-page drop-off rates
Full and partial submissions (yes, even the abandoned ones)
Need to test what actually works? Launch an A/B test in just a few clicks. Create Variant B, change something (headline, image, layout), and split the traffic. Once you have enough data, pick the winner.
No code needed. Just insights.
Integrations & Automation
Want your form data to go straight into your tools? Involve.me plays nicely with:
Google Analytics & Google Tag Manager
Facebook Pixel
CRMs like HubSpot, Salesforce
Email tools like Mailchimp
Slack, Trello, and more
Example: When someone fills out your form, they can automatically become a contact in HubSpot, trigger a Trello card, and ping your sales team in Slack.
That way, your form doesn’t just collect data. It powers your workflow.
How Do I Optimize the Structure for Mobile and Speed?
A clear landing page best practice is to start with this rule: design for mobile first. Not as an afterthought. Not as a quick tweak at the end. Mobile traffic is often the majority now, and a clunky mobile experience kills conversions. Use a clean single-column flow on phones with mobile-friendly inputs. Avoid heavy media unless it truly sells. Keep the hero message visible without scrolling if you can. Finally, test on real devices and slower connections.
Here’s a detailed breakdown on how to make your involve.me landing page look great and load fast on phones:
Keep It Single-Column and Stack-Friendly
Most mobile screens = narrow screens. So stick to a vertical flow layout. If your desktop version has image left / text right, mobile will likely show image then text. Is that okay? If not, rearrange.
Quick layout tips:
Short paragraphs > long blocks of text
Use bullet points (like this) to keep it skimmable
Add clear headings so people can scan fast
Cut filler images or fluff content
Make It Easy to Tap
Tiny buttons = frustrated thumbs. Follow this rule: everything clickable should be at least 44px tall. That includes buttons, form fields, dropdowns…you name it.
And use mobile-friendly input types in your forms. Need a phone number? Set the input type so the phone’s number pad pops up. Need an email? Use the “email” field so “@” and “.com” are right there on the keyboard. Every second saved counts.
Put the Good Stuff Up Top
Most mobile users? They don’t scroll right away. So when someone opens your landing page, they should instantly know what it’s about, and what to do next. Put your primary headline, clear value proposition, and CTA above the fold.
You might need to:
Shrink your hero image
Bump the text size
Reorder or hide non-essential stuff (like illustrations)
Optimize Your Media
Big images and autoplay videos are conversion killers on mobile. Here’s how to fix that:
Compress your images before uploading. Use JPEGs for photos, PNGs for graphics, and WebP if it’s supported.
Center the focus of background images so they crop well on smaller screens.
Skip autoplay videos on mobile. If a video isn’t crucial, consider hiding it or using a static image fallback.
Keep the Page Fast
Even a 1-second delay can hurt conversions.
Don’t overload the page with too many images or widgets
Stick to one custom font if possible (each one adds load time)
Avoid unnecessary scripts and embeds
Use involve.me’s built-in forms and integrations instead of third-party add-ons
Also, test your custom code. If it slows the entire page or breaks the layout on mobile, it’s not worth it.
Actually Test on Real Devices
Editor previews are fine. But nothing beats checking your page on different devices with different screen sizes:
iPhones and Androids
Different browsers (Safari, Chrome)
Different speeds (turn off WiFi and try 4G)
Look for:
Horizontal scrolling (bad sign)
Slow media load
Misaligned buttons or cut-off text
How Do I Measure and Iterate on My Landing Page Structure?
Track visits, conversion rate, CTA clicks, bounce, time on page, scroll depth. For multi-step forms, watch step-by-step completion. Tag traffic with UTMs. Run focused A/B tests: one meaningful change at a time. Use heatmaps if needed for deeper insight. Review performance regularly. Tweak. Repeat. Even a 1–2% lift adds up fast. If you're not regularly measuring and tweaking your landing page, you're leaving conversions on the table. Here's how to get serious about improving your page structure:
Start with the Basics
Track these key metrics:
Visits: How many people are landing on the page? This gives you context.
Conversion Rate (CR): The number of people who complete your desired action (form submission, click, etc.) divided by total visits. This is your north star.
Call to action (CTA) Clicks: Especially important if your page leads to another step (like a product or sign-up page).
Bounce Rate: If lots of people leave right away, your above-the-fold landing page content might not be cutting it. Or maybe the page loads too slowly.
Time on Page & Scroll Depth: These show how engaged users are. If folks are bailing in under 10 seconds, something's off.
Dig into behavior: Are people starting your form but not finishing? That’s a red flag. Break down the form step-by-step to see where they’re dropping off. For multi-step forms, track how many users move from Step 1 to Step 2 and so on. If 100 people start and only 50 finish, figure out what’s happening in the middle.
Check device performance: Desktop may perform well, but mobile could be struggling. Maybe your form’s too long on mobile or the hero image doesn’t load right.
Set Up the Right Tools
UTM Parameters: Add these to your URLs so you know which traffic source is actually converting (email vs Facebook, for instance).
Analytics: Involve.me comes with in-depth built-in analytics. For deeper dives, connect it to Google Analytics.
Conversion Pixels: If you’re running ads, place Facebook or Google Ads pixels on your thank-you page. This helps track which ads drive actual results.
Heatmaps & Session Recordings: Tools like Hotjar or Crazy Egg let you see where users click, how far they scroll, and where they get stuck.
Test and Iterate
Don’t just guess, test: Run A/B tests to see what really moves the needle:
Does a video beat an image?
Does headline A outperform headline B?
What happens if you move the form higher up?
Create a hypothesis. Change one thing. Let it run. Then compare results. Don’t test five changes at once or you won’t know what worked.
Talk to your users: Ask for feedback directly on the page. It can be as simple as “Was this page helpful?” with a yes/no or star rating. Or include an optional comment box. You’ll often discover problems (or ideas) you never saw coming.
Check lead quality, not just quantity: Are your leads actually converting into satisfied customers? If a variant gets more form fills but worse leads, tweak your form to qualify them better. Add a question. Use email verification. Small things can filter out the noise.
Review regularly:
Daily when you launch or make big changes.
Weekly or monthly once things settle.
Align your reviews with campaign activity. Sent a newsletter this morning? Check back tomorrow to see how that traffic performed.
Iterate with intention: Saw a drop-off on Step 2? Try shortening it. Low engagement above the fold? Test a bolder headline. Form getting clicks but no submissions? Add a note like "Takes just 30 seconds."
Keep Improving
Every change should tie back to data. If something improves performance, keep it. If not, roll it back.
The truth is, your landing page is never “done.” It's a living thing. Keep measuring. Keep learning. Keep improving.
Even a 1% conversion lift can mean a lot more leads, or revenue.
That’s why it’s worth the effort.
Start with a template
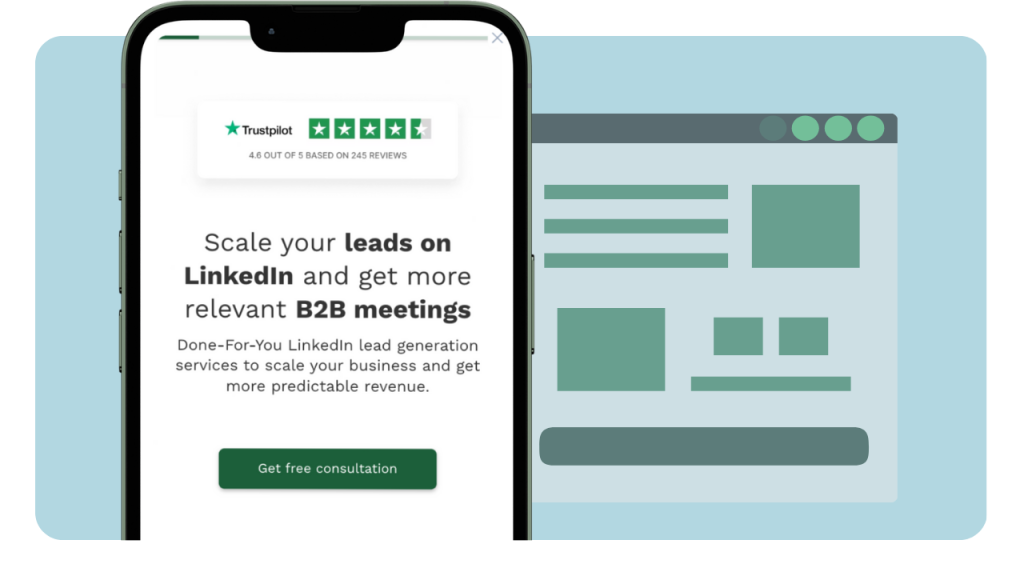
Agency Lead Generation Form Template
Whitepaper Download Template
Appointment Funnel Template
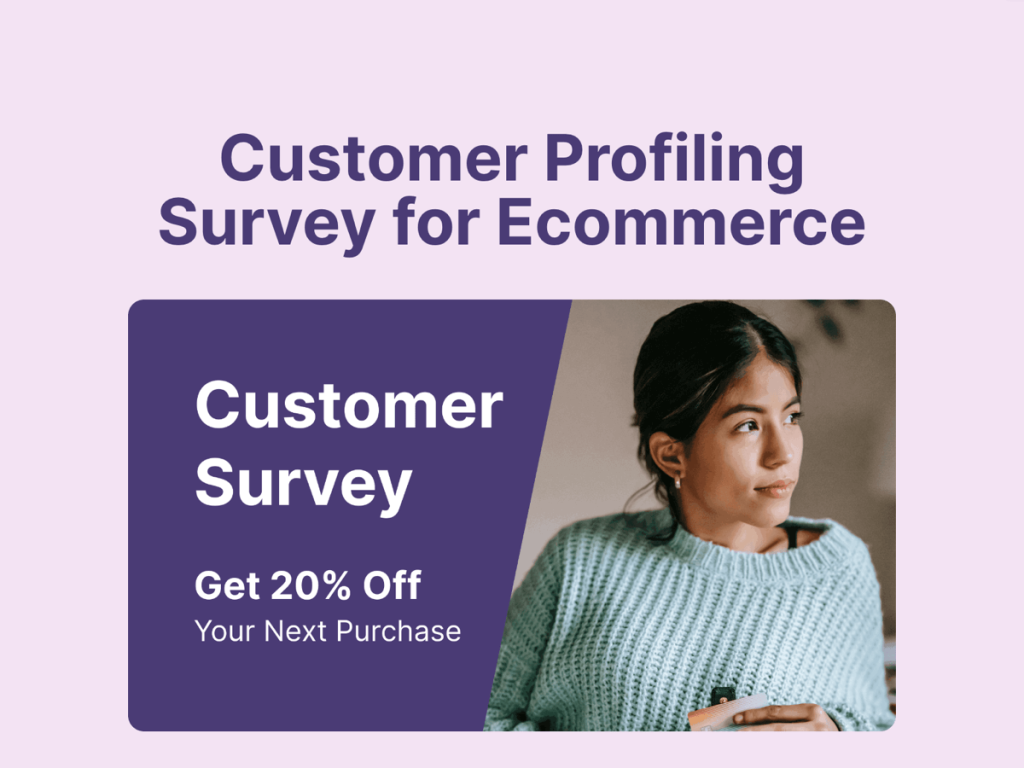
Customer Profiling Survey for Ecommerce Template
Lead Magnet Quiz for Real Estate Template
Website ROI Calculator Template
Build a landing page with involve.me
Landing Page Structure FAQs
-
Think of your page like a story. Here's the flow that usually works best: Start with a hero section – a big headline and a strong CTA. Then, dive into your value proposition or key benefits. Follow that up with social proof like testimonials or logos to build trust. After that, present your form or main CTA so people can take action. Below that, include any extra details like features or FAQs. End with a final CTA to give them one last nudge. The footer should be minimal – mostly legal links and contact info. You’re guiding people from attention to interest to trust to action.
-
Sometimes, yes. If you’re offering something simple like a free trial, quote, or download, put the short form front and center. The less friction, the better. But if your offer takes more convincing, like a product with multiple features or a B2B service, then slapping a form up top might feel too pushy. Instead, use a strong CTA button in the hero section and let it scroll people to the form once they’ve seen some value. The rule of thumb? If it's a simple offer, the form belongs in the hero. If it's a more considered decision, give them context first. Always test. Sometimes just moving a form a little lower can improve conversions.
-
You want one main CTA goal, like "Sign Up" or "Get a Quote." That doesn't mean you only show it once. Repeat the same CTA throughout the page – in the hero, after key sections, and at the bottom. One goal, many placements. You can have a secondary CTA like "Learn more" or "Contact us," but keep it subtle so it doesn't compete with the main goal. One page should have one job. Keep the focus tight.
-
It depends on your industry and niche, but in general, use what builds trust and feels real. Testimonials with names, faces, and specific results work wonders. Client logos that people recognize help too. Media mentions or badges like "As seen in..." or "Google Partner" add credibility. Stats like "10,000+ happy users" or "#1 on ProductHunt" can be compelling. And don’t forget ratings, reviews, or awards. Mix it up. A wall of logos shows breadth, while a strong customer quote adds depth. The key is authenticity.
-
Nope. But they help a lot when your offer isn’t completely self-explanatory or when people might hesitate without more info. For example, if you're asking for a sign-up or purchase, some folks will have last-minute doubts. FAQs can calm them down and keep them on the page. Include 3 to 5 short answers to things like pricing, cancellation, privacy, what happens after they click, or any common product questions. If answering these questions could stop someone from bouncing, it’s worth it.
-
Here’s the quick breakdown: A click-through page doesn’t have a form. Its job is to warm people up and get them to click to the next step, like checkout. You’ll use persuasive copy, benefits, images, and repeated CTAs. A lead-gen page, on the other hand, includes a form to collect info like a name or email. The form is usually central, with trust-building proof and benefits around it. Design accordingly. Click-through pages should hype up the next step. Lead-gen pages should make the form irresistible and easy to submit.
-
Keep it simple. Think of it as your page’s fine print. It usually includes links to your privacy policy and terms of service, which are legal must-haves, especially if you're collecting data or running ads. Include a way to get in touch, like a support email. A light disclaimer like "Results may vary" is helpful if needed. Don’t forget the copyright line with your company name. You can include a subtle secondary CTA, like a newsletter sign-up, but don’t clutter it. This isn't your main website footer. Keep it clean and focused.

